Skip to content
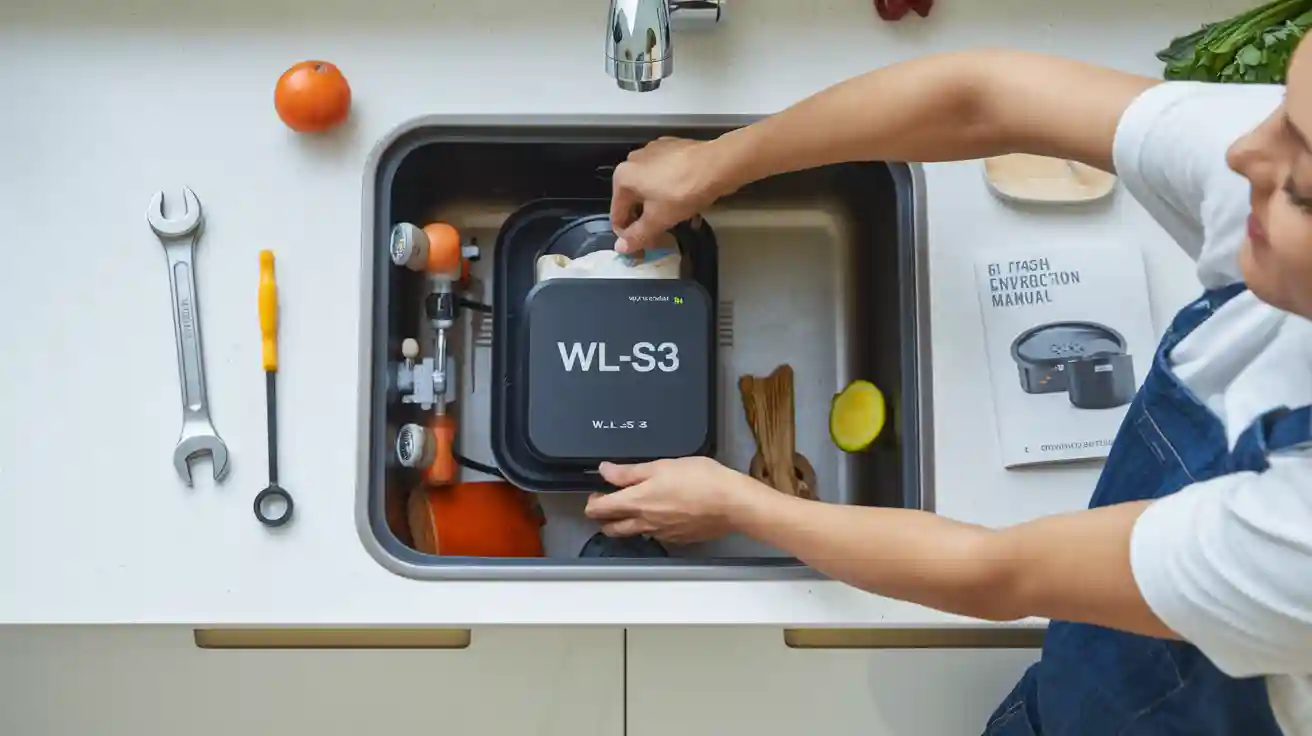
You can tackle garbage disposal installation as a diy project without calling a plumber. Many choose to install the WL-S3 themselves because the compact design fits most kitchens, the universal mount system makes installation easy, and you save money without calling a plumber. Installing food disposal yourself means less hassle and more control over your disposal.
- Homeowners like that installation works without calling a plumber.
- The WL-S3 makes disposal upgrades simple and quiet without calling a plumber.
Tools and Materials for Installing Food Disposal
Essential Tools for Installation
Before you start installing food disposal, you need to gather the right tools. Having everything ready makes the job much easier. Here’s what you should have on hand:
- Phillips screwdriver
- Flathead screwdriver
- Adjustable wrench
- Plumber’s putty
- Pipe wrench
- Bucket or bowl (for catching water)
- Safety gloves
- Flashlight
Tip: Lay out your tools before you begin. This way, you won’t have to stop in the middle of installing food disposal to search for something.
You only need basic hand tools for most steps. If you have the required tools for installing, you can finish the project faster and with less stress.
Parts and Materials Checklist
You also need to check that you have all the parts and materials for installing food disposal. Most WL-S3 kits include the main items, but it’s smart to double-check. Here’s a quick checklist:
| Part/Material | Included in Box? | Needed for Install? |
|---|---|---|
| WL-S3 Disposer Unit | ✅ | ✅ |
| Mounting bracket | ✅ | ✅ |
| Discharge tube | ✅ | ✅ |
| Rubber gasket | ✅ | ✅ |
| Power cord | ❓ | ✅ |
| Plumber’s putty | ❌ | ✅ |
| Screws and bolts | ✅ | ✅ |
Check off each item before you start installing food disposal. This helps you avoid delays and keeps the process smooth.
How to Install: Preparation and Safety
Safety Precautions Before Installation
Before you start installing food disposal, you need to think about safety. Many people want to jump right into garbage disposal installation, but taking a few minutes to prepare can help you avoid accidents and costly mistakes.
Here are some important safety risks you should know about:
- Sharp blades inside the unit can cause serious cuts, even if the power is off.
- Incorrect wiring or water near electrical parts can lead to electric shock.
- If you do not install the unit correctly, you might damage your plumbing or cause leaks.
- Some manufacturers may void your warranty if you do not follow their installation instructions.
- Overloading a septic system with food waste can cause backups and health problems.
Note: Never put your hands inside the disposer, even if you think it is off. Always use tools to remove anything stuck inside.
To keep yourself safe during installation, follow these steps:
- Check if your sink and plumbing can handle a new disposer. If you are not sure, ask a plumber or look at your kitchen setup.
- Make sure you have a power outlet that is safe to use near water. If you are not sure, ask an electrician.
- Remove all dishes, silverware, and other items from the sink before you begin.
- Wear safety gloves to protect your hands from sharp edges.
- Keep towels and a bucket nearby to catch any water that spills when you disconnect pipes.
- Use plumber’s putty to seal the flange and prevent leaks.
- Always match wire colors and cover the wires after connecting them.
- If you have a dishwasher, follow the instructions to connect the drain hose safely.
You can make garbage disposal installation much safer by following these tips. Take your time and double-check each step.
Power and Water Shutoff Steps
You must turn off the power before you start any work. This is the most important step in how to install a food waste disposer. Water and electricity do not mix, so you need to be careful.
Follow these steps to turn off the power and water:
- Find the circuit breaker that controls the kitchen outlets. Flip the switch to turn off the power to the area where you will install the unit.
- Test the outlet with a voltage tester to make sure there is no electricity. Do not skip this step.
- Unplug the old disposer if it has a plug. If it is hardwired, make sure the wires are not live.
- Turn off the water supply to the sink. You can usually find the shutoff valve under the sink. Turn it clockwise until it stops.
- Open the faucet to let any water left in the pipes drain out.
- Place a bucket under the pipes to catch any water when you disconnect them.
Tip: Always keep the power off until you finish installing food disposal and check for leaks. Only turn it back on when you are ready to test the new unit.
By following these steps, you lower the risk of electric shock and water damage. You also make the installation process smoother and safer. Remember, taking a few extra minutes to turn off the power and water can save you from big problems later.
Removing Old Unit Before You Install a Garbage Disposal
Disconnecting Power and Plumbing
Before you install a garbage disposal, you need to disconnect the old one. Start by making sure the power is off. Unplug the disposal or turn off the breaker. Use a voltage tester to double-check that no power is running to the unit. Safety comes first!
Next, gather your tools. You will need:
- Screwdrivers for removing cover plates and wire nuts
- Pliers for loosening nuts on the discharge tube and drain trap
- A hex wrench or wrenchette for the mounting ring
- A hammer for tapping out the dishwasher knockout plug if needed
Here’s a quick look at what each tool does:
| Tool | Purpose/Use |
|---|---|
| Screwdriver | Removing cover plates, unscrewing wire nuts |
| Pliers | Loosening nuts on discharge tube and drain trap |
| Hex wrench | Loosening mounting screws |
| Hammer | Tapping out dishwasher knockout plug |
| Wrenchette | Loosening and tightening mounting ring |
Place a bucket under the pipes to catch any water. Loosen the nuts on the discharge tube and drain trap. Disconnect the plumbing from the disposal. If your dishwasher connects to the disposal, use a hammer and screwdriver to tap out the knockout plug.
Taking Out the Old Disposer
Now you are ready to take out the old disposal. Support the disposal with one hand while you use the wrenchette or hex wrench to loosen the mounting ring. The disposal will drop down once the ring is loose, so keep a firm grip.
Set the old disposal aside. If you plan to install a garbage disposal right away, check the sink opening. You may need to remove the old sink strainer if you see one. Clean the area so the new disposal fits well.
Tip: Always keep your hands clear of sharp edges when you remove the old unit. Wear gloves for extra safety.
Once you finish this step, you are ready to install a garbage disposal and upgrade your kitchen.
Preparing the Sink for Installation
Cleaning and Inspecting the Mounting Area
Before you install your new disposer, you need to make sure your sink is ready. Start by clearing out everything from under your sink. You want plenty of space to work. Now, focus on the area around your sink drain. If you just removed an old disposer, you will see some leftover parts and maybe some sticky plumber’s putty.
Here’s a simple way to get your sink ready:
- Find the three screws and two rings that hold the old mounting assembly. Remove them, starting with the ring that fits into the groove on the sink sleeve.
- Take out the sink sleeve, gasket, and drain flange. Set these aside.
- Clean the sink opening very well. Scrape away any old plumber’s putty, gaskets, or debris you see or feel. You want the area around the sink drain to be smooth and clean.
If you are swapping in the same model, you might be able to reuse the old mounting assembly. Just check that it’s still in good shape.
A clean sink makes the rest of the job much easier. You will get a better seal and avoid leaks later.
Checking Sink Compatibility
Not every sink works with every disposer. You need to check a few things before you move on. First, look at the thickness of your kitchen sink. Most disposers fit sinks up to 1/2 inch to 3/4 inch thick. If your sink is thicker, you might need a special adapter.
Next, check the size of your sink drain opening. The standard size is 3-1/2 inches. If your kitchen sink has a different size, you may need to get a new flange or adapter. Also, make sure there is enough space under your sink for the WL-S3 unit. Measure the height and width so you know the disposer will fit.
Tip: If you have a double kitchen sink, make sure you know which side you want to use for the disposer. This helps with plumbing and dishwasher connections.
Once you check these things, you can feel confident that your sink is ready for your new food waste disposer.
Installing the Mounting Bracket for Your WL-S3
Assembling the Mounting Ring
You’re almost ready to install your WL-S3 disposal. First, you need to put together the mounting ring. Take the mounting ring, gasket, and flange from your kit. Place the rubber gasket on the underside of the flange. Press the flange into the drain opening of your sink. Make sure it sits flat and snug. Now, slide the mounting ring up from under the sink and fit it over the flange. Hold everything steady while you attach the snap ring. This snap ring locks the mounting ring in place. You want the mounting ring to feel secure before you move on.
Tip: If you see any old plumber’s putty or debris, clean it off before you install the new mounting bracket. A clean surface helps prevent leaks.
Securing the Bracket to the Sink
Now it’s time to secure the bracket to your sink. Line up the bracket with the mounting ring. Tighten the screws evenly, moving from one to the next in a circle. This keeps the bracket level and helps your disposal stay stable. Don’t rush—take your time to check that the bracket sits flush against the sink.
Many people make mistakes at this step. Here are some common problems to watch out for:
- Some people skip using sealant or plumber’s putty around the sink edges. This can cause leaks and even mold.
- Others use only adhesive and forget the mechanical attachments. This makes the sink unstable, especially with the weight and vibration of a disposal.
- Over-tightening screws can crack the sink or mounting bracket.
- Not following the instructions can lead to an improper install and might void your warranty.
Always double-check your work. If you notice the bracket feels loose or uneven, adjust it before you continue. When you install the new mounting bracket the right way, your kitchen sink will handle your new disposal with no trouble.
How to Install the WL-S3 Disposer Wiring
Electrical Connection Steps
You’re almost ready to power up your new disposal! If your WL-S3 comes with a power cord, you just plug it in. If not, you’ll need to wire the garbage disposal yourself. Don’t worry—this part is easier than it sounds.
Here’s what you do:
- Remove the electrical cover plate on the bottom of the disposal.
- Pull out the wires. You’ll see black, white, and green wires.
- Connect the black wire from your house to the black wire on the disposal. Twist them together with a wire nut.
- Do the same with the white wires.
- Attach the green (or bare) ground wire to the green screw on the disposal.
- Tuck the wires back in and replace the cover plate.
Tip: If you’re not sure about any step, check the manual or ask someone with electrical experience.
Wiring Safety Tips
Safety matters when you work with electricity. Always double-check that the power is off before you touch any wires. Use a voltage tester to make sure. Wear rubber-soled shoes and keep your hands dry.
Here’s a quick safety checklist:
| Step | Why It Matters |
|---|---|
| Power off | Prevents electric shock |
| Use wire nuts | Stops wires from touching |
| Ground connection | Protects from surges |
| Replace cover plate | Keeps wires safe and dry |
Take your time with this part. When you wire your disposal correctly, you keep your kitchen safe and your new unit running smoothly.
Attaching and Locking the Disposer Unit
Aligning and Securing the Disposer
Now you get to the exciting part—putting your new disposal in place! Hold the WL-S3 under your sink. Line up the top of the disposal with the mounting bracket you just installed. You want the rubber gasket to sit flat against the bottom of your sink. This step helps stop leaks before they start.
To attach the disposal to the mounting bracket, turn the mounting ring until you feel it lock. You might need to wiggle the disposal a little to get it to line up. Don’t worry if it takes a few tries. You want the disposal to hang straight down from the sink. If you see the unit tilting, take it off and try again.
Tip: Support the disposal with one hand while you turn the mounting ring with the other. This keeps the weight off your sink and makes the job easier.
Ensuring a Tight and Secure Fit
You want your disposal to stay put, even when it’s running. After you install the unit, check that it feels snug against the sink. Give the disposal a gentle shake. If it moves, tighten the mounting ring a bit more. Make sure the rubber gasket is pressed firmly between the disposal and the sink.
Here’s a quick checklist to help you:
| Step | What to Check |
|---|---|
| Disposal hangs straight | No tilting or wobbling |
| Mounting ring is tight | No gaps at the sink |
| Gasket is in place | No leaks around the sink |
If everything looks good, you’re ready for the next step. You just finished one of the most important parts of the install. Your sink and disposal are now working together!
Connecting the Drain and Dishwasher During Installation
Attaching the Discharge Tube
You are almost done! Now it’s time to connect the discharge tube so your disposal can send food waste down the drain. Follow these steps to get it right:
- Insert the discharge tube into the discharge coupler on your disposal.
- Slide the clamp over the discharge tube and make sure it sits in the groove on the rubber tailpipe coupler.
- Rotate the disposal until the discharge tube lines up with your drain trap. If the tube is too long, cut it to fit. If it’s too short, you can buy an extension.
- Attach the gasket to the discharge outlet. Use the flange and bolts to secure the tube.
- Make sure the discharge pipe lines up perfectly with your drain pipes. If you need to, use a tee pipe before the P-trap.
- Lock the disposal to the sink mounting assembly using the wrenchette.
Tip: Double-check that all connections feel tight. A loose tube can cause leaks under your sink.
Connecting the Dishwasher Hose (If Needed)
If you have a dishwasher, you need to connect its drain hose to your new disposal. Here’s how you do it:
- Find the dishwasher inlet on the side of your disposal. If you see a plastic plug inside, knock it out with a screwdriver and hammer.
- Slide the dishwasher drain hose over the inlet.
- Use a hose clamp to secure the hose tightly. This keeps water from leaking when your dishwasher runs.
Now your disposal and dishwasher both send waste water down the same drain. You have finished one of the last steps in your installation!
Testing and Leak Check After You Install
Running Water and Power for Testing
You have finished installing your new WL-S3, but you still need to make sure everything works. Now comes the important part—testing your disposal. Start by looking at all the connections under your sink. Make sure nothing looks loose or out of place.
Here’s a simple way to test your new setup:
- Fill your sink with water. Let it sit for a minute so you can spot any drips.
- Look closely at the disposal and the pipes. If you see water, stop and tighten the fittings.
- If everything stays dry, plug in the disposal.
- Turn on the power at the breaker or outlet.
- Flip the switch to test the garbage disposal. Listen for a smooth, steady sound. You should not hear any grinding or rattling.
- Run water through the disposal while it is on. This helps you spot leaks and makes sure the water drains fast.
If you notice any strange noises or vibrations, turn off the disposal right away and double-check your installation.
Checking for Leaks and Proper Operation
You want your disposal to work perfectly and stay leak-free. After you test the unit, check for leaks one more time. Run water through the sink and watch every joint and connection. Even a small drip can cause problems later.
Here’s a quick table to help you spot issues:
| What to Check | What to Do If You Find a Problem |
|---|---|
| Water around pipes | Tighten connections |
| Odd noises | Re-align or re-mount disposal |
| Slow draining | Check for clogs or misaligned pipes |
Take your time with this step. A careful test now saves you from headaches in the future. Once you finish, you can feel proud of your new disposal installation!
Troubleshooting Installation Issues
What to Do If the Disposer Won’t Start
You just finished installing your new disposal, but nothing happens when you flip the switch. Don’t panic! You can fix most problems with a few simple checks.
- Make sure the disposal is plugged in. Sometimes the cord slips out during installation.
- Check your circuit breaker. If it tripped, reset it and try again.
- Press the red reset button on the bottom of the disposal. This button pops out if the motor overheats.
- Test the wall switch. If you hear a click but the disposal stays silent, the switch might need replacing.
Tip: If you hear a humming sound, something might be stuck inside the disposal. Turn off the power, then use a wooden spoon to gently turn the blades.
If your disposal still won’t start, check the wiring connections. Loose wires can stop the unit from working.
Fixing Minor Leaks
Leaks can show up after you install a disposal. You can fix most leaks with a few quick steps.
- Look at the sink flange. If water drips from the top, tighten the mounting ring or add more plumber’s putty.
- Check the discharge tube. If you see water there, tighten the bolts or replace the gasket.
- Inspect the dishwasher hose connection. A loose clamp can let water escape.
Here’s a quick table to help you spot and fix leaks:
| Leak Location | Quick Fix |
|---|---|
| Sink flange | Tighten ring, add putty |
| Discharge tube | Tighten bolts, replace gasket |
| Dishwasher hose | Secure clamp |
Always dry the area and test again after each fix. Your disposal should run dry and quiet when you finish.
You did it! Your WL-S3 Smart Food Waste Disposer is ready to use.
- Double-check every connection for safety.
- Enjoy your cleaner kitchen.
Keep your manual nearby. It helps with quick fixes and future maintenance.
Smile—you just upgraded your kitchen without calling a pro! 🎉
FAQ
How long does it take to install the WL-S3 disposer?
Most people finish in about one to two hours. If you have all your tools ready, you might finish even faster.
Can I use the WL-S3 with a septic system?
Yes, you can use it with most septic systems. Just avoid putting grease, bones, or fibrous foods down the drain.
What should I do if the disposer smells bad?
Try grinding ice cubes and lemon peels. This helps clean the blades and freshen the smell. You can also rinse with cold water.