Skip to content
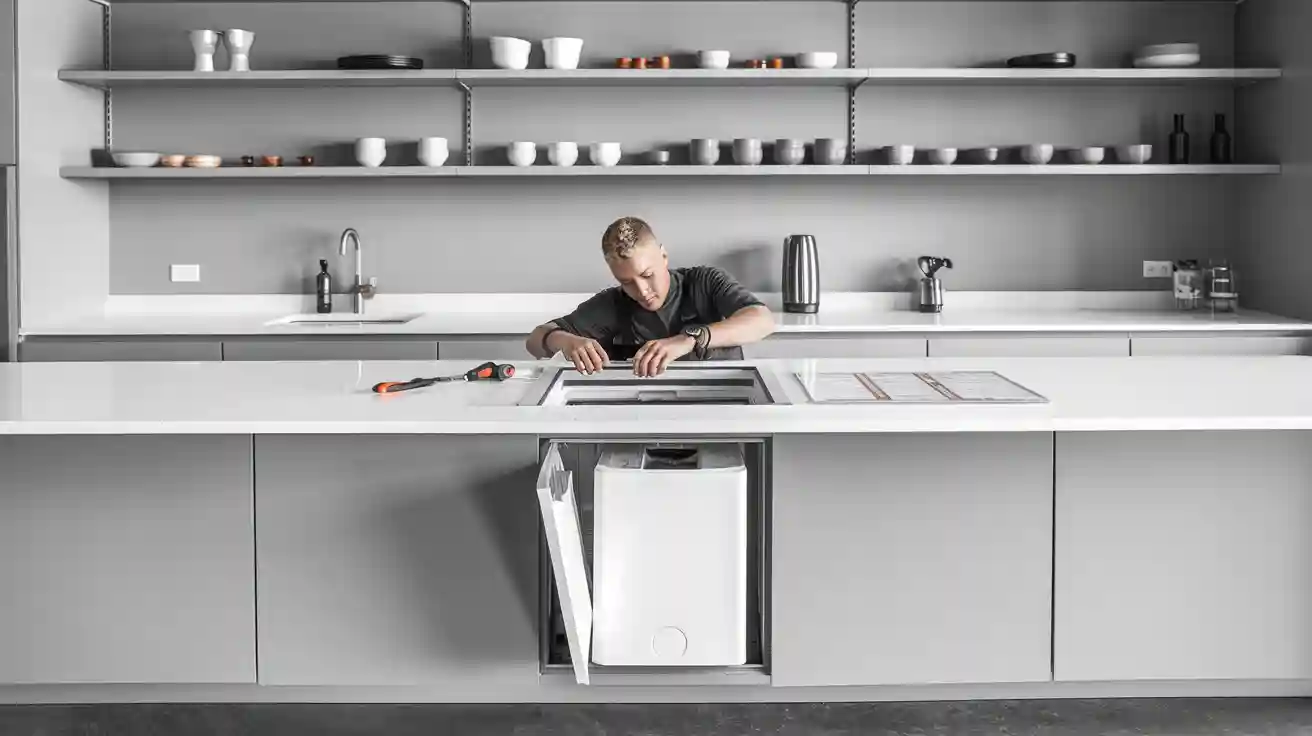
Installing under counter ice makers in your home brings clear benefits. You boost kitchen functionality and enjoy more convenience by freeing up valuable counter and freezer space. The dedicated under counter ice maker fits flush with cabinetry, so you maximize convenience and minimize clutter.
| Ice Maker Type | Space Usage | Ice Production Capacity (lbs/day) | Impact on Freezer Space | Impact on Counter Space |
|---|---|---|---|---|
| Undercounter Ice Maker | Built into cabinetry, flush design | 20-50 | Frees freezer space | Saves counter space |
| Countertop Ice Maker | Occupies counter space | 10-30 | Does not affect freezer space | Uses counter space |
| Traditional Ice Trays | Occupies freezer space | Slow production | Reduces freezer storage space | No counter space used |
Under Counter Ice Makers: What You Need to Know
Key Features of Under-Counter Ice Makers
When you choose an under-counter ice maker, you want to look for features that match your needs. The right features help you get the most out of your kitchen space and make daily life easier. Here is a table that shows the most important features to consider:
| Feature | Importance / Explanation |
|---|---|
| Capacity | Determines how much ice can be produced and stored; important for matching household or commercial demand. |
| Ice Type | Different shapes (cube, crescent, block, crushed) suit various uses; clear ice is denser and longer lasting. |
| Cooling System | Air-cooled units are energy efficient but need space and ventilation; water-cooled units suit limited space but use more water. |
| Drainage System | Requires proper drainage setup; gravity drains need nearby drains, while drain pumps allow more flexible placement. |
| Ease of Use | Simple controls and status indicators improve user experience. |
| Noise Levels | Important for home or quiet environments. |
| Energy Efficiency | Affects operating costs and environmental impact. |
| Physical Size | Must fit under counters, so dimensions are critical. |
A high-quality undercounter ice maker often balances performance, size, and value. For example, some models can produce up to 100 pounds of ice each day. These under-counter ice machines fit neatly under your counters, offer easy-to-use control panels, and start making ice as soon as you remove some from the bin. This means you always have fresh ice ready for your family or guests.
Differences from Other Ice Makers
You will notice several differences between under-counter ice makers and other types of ice makers. Under-counter ice machines install directly into your cabinetry. This design saves space and keeps your kitchen looking organized. Unlike countertop models, under-counter ice machines do not take up valuable workspace. You also avoid the hassle of filling and emptying ice trays in your freezer.
Tip: Under-counter ice makers often run quieter than portable models, making them a better choice for open kitchens or quiet homes.
You get more ice, better storage, and a cleaner look with an under-counter ice maker. These machines also offer more options for ice type and size, so you can pick what works best for your drinks or parties.
Space-Saving Benefits of Under-Counter Ice Machines
Freeing Up Counter Space
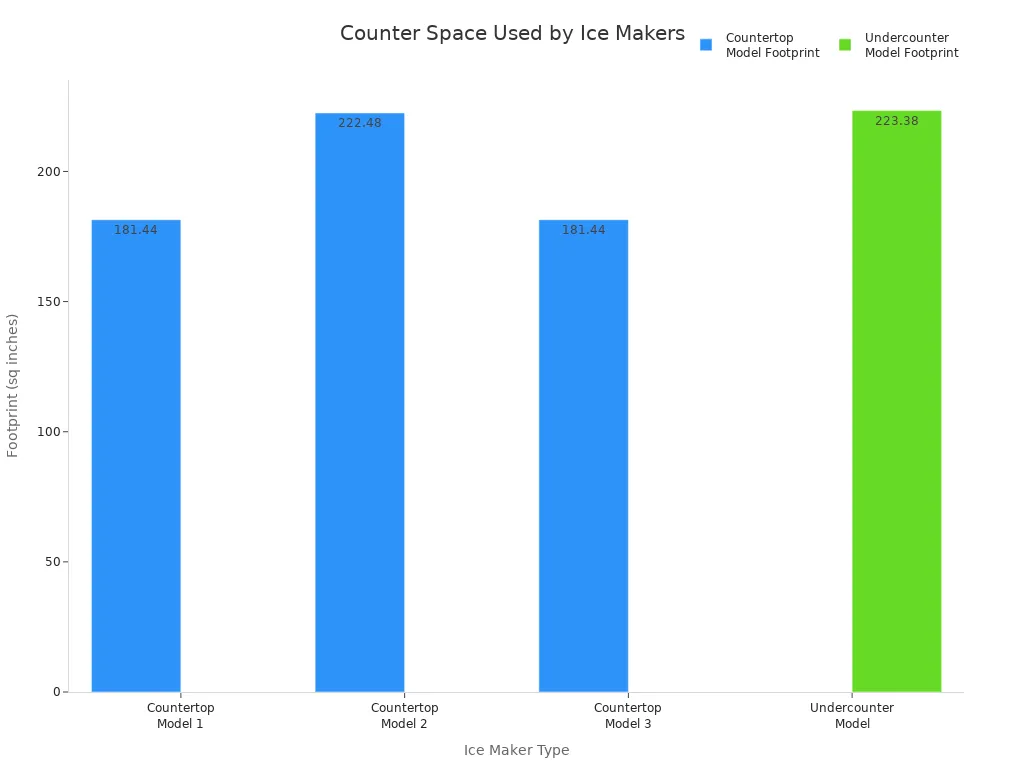
You can reclaim a surprising amount of counter space when you install under counter ice makers. These machines fit neatly below your countertop, so you do not lose valuable workspace. Take a look at the table below to see how much space you save compared to countertop models:
| Ice Maker Type | Depth (inches) | Width (inches) | Height (inches) | Notes |
|---|---|---|---|---|
| Undercounter Model | 14.6 | 15.3 | 31.4 | Fits under counter, frees counter space |
| Countertop Model 1 | 13.58 | 13.35 | 23.7 | Occupies counter surface |
| Countertop Model 2 | 14.57 | 15.28 | 23.67 | Occupies counter surface |
| Countertop Model 3 | 13.58 | 13.35 | 23.7 | Compact countertop model |
By choosing a compact and efficient appliance, you keep your counters clear for cooking, prepping, or serving food.

Reducing Freezer Clutter
Under counter ice makers help you reduce clutter in your freezer. You do not need to fill trays or store bags of ice. The compact design of these machines means you always have ice ready without taking up freezer space. This makes it easier to organize frozen foods and keep your freezer neat. You can use your freezer for what matters most, like storing meals and snacks.
Enhancing Kitchen Organization
You improve your kitchen’s organization when you add under-counter ice machines. These machines fit seamlessly with your cabinetry and keep your kitchen looking tidy. You get a constant supply of ice close to your workstation, which helps you work faster and more efficiently. Here are some benefits of under-counter ice makers for kitchen organization:
- You maintain a clean and unobtrusive appearance.
- You optimize your kitchen layout without sacrificing ice production.
- You enjoy customizable finishes that blend with your décor.
- You reduce interruptions during food prep with on-demand ice.
Tip: A compact under counter ice maker can streamline your kitchen tasks and make your space feel larger.
Installation Planning for Under Counter Ice Makers
Choosing the Right Location
You need to select a spot that fits your under-counter ice maker and makes daily use easy. Look for a place near your refrigerator or main prep area. Make sure the location has access to a water line and a grounded electrical outlet. If you plan to install outdoors, pick a model built for outdoor use. Check that the space allows for proper ventilation and drainage. Sometimes, you may need professional help for a complex installation.
Tip: Choose a location that lets you reach the ice easily and keeps your kitchen organized.
Measuring for a Proper Fit
Measure the height, width, and depth of your cabinet space before you start the setup. Most under-counter ice makers stand less than 40 inches tall, with some models as low as 33 inches for ADA compliance. You should also measure for ventilation clearance. Use a tape measure to check these dimensions:
| Dimension Aspect | Measurement |
|---|---|
| Width | About 14 3/4 inches |
| Height | About 33 5/8 inches |
| Depth | About 23 inches |
Always check the manufacturer’s guide for exact measurements and ventilation requirements.
Ensuring Ventilation and Clearance
Proper ventilation keeps your under-counter ice maker running safely. Never place the unit in a sealed cabinet. Leave a few inches of space around the sides and top. This airflow prevents overheating and helps the machine work well. Ventilation requirements may change based on the model, so read the instructions carefully.
Planning Water and Drain Access
Your under-counter ice maker needs a dedicated water line and a way to drain water. Gravity drains work best if the drain is close and lower than the outlet. If the drain is higher or farther away, you may need a pump. Drainage considerations include installing traps and air gaps to block sewer gases. You should not connect the ice maker drain directly to the sink drain.
| Drain Type | Description | Installation Notes |
|---|---|---|
| Floor Drains | Handles high water volumes | Needs air gap to prevent backflow |
| Standpipe Drains | Vertical pipes from floor or wall | Must be sized and placed correctly |
| Wall Drains | Vertical drains through walls | Requires P-traps and air gaps |
| Drain Pumps | Moves water uphill when gravity is not enough | Match pump to water volume; use only when necessary |
Meeting Electrical Requirements
You must use a dedicated grounded outlet for your under-counter ice maker. Most models need 115V power, but larger units may require 220V. Avoid adapters and extension cords. A dedicated circuit helps prevent overloads. Good ventilation and clearance also protect against overheating. Always follow the manufacturer’s instructions for safe installation.
Step-by-Step Installation of Under-Counter Ice Maker
Preparing the Installation Area
You need to get your space ready before you start the installation steps. Gather all the tools and materials you need. Make sure you have enough room for your under-counter ice maker and that the area is clean and level. Here is a simple checklist to help you prepare:
- Choose the spot for your under-counter ice maker. Make sure it is close to a water source and a power outlet.
- Turn off the water supply by closing the nearest valve. This prevents leaks while you work.
- Open a faucet to let out any leftover water and pressure.
- Check that you have all the tools and parts. You may need a wrench, screwdriver, tape measure, level, and drill.
- Confirm that the space is clear of obstacles and that the floor is stable and flat.
Tip: Always double-check your measurements to make sure your under-counter ice maker will fit perfectly.
Connecting the Water Supply
You must connect the water supply to your under-counter ice maker for it to work. Use the right tools and materials to avoid leaks. Here is a table of what you may need:
| Tools and Materials Needed | Description and Purpose |
|---|---|
| Pipe cutter | To cut copper tubing or water supply pipe |
| Copper tubing | Water supply pipe material |
| Tee fittings | To connect water supply line without major plumbing work |
| Water supply pipe | Connects ice maker to home water supply |
| Adjustable wrench | Tightens fittings and connections |
| Teflon tape | Seals threaded connections to prevent leaks |
Follow these steps to connect the water supply:
- Cut the water supply line to the right length using a pipe cutter.
- Attach a tee fitting to the cold water line, usually found under the kitchen sink.
- Connect the water supply pipe from the tee fitting to the ice maker’s water inlet.
- Wrap threaded connections with Teflon tape to stop leaks.
- Tighten all fittings with a wrench.
- Turn on the water supply slowly and check for leaks. If you see any, turn off the water and fix the connections.
Note: Always use a dedicated water line for your under-counter ice maker. This helps prevent water pressure problems and keeps your ice clean.
Setting Up the Drain Line
A good drain line setup keeps your kitchen dry and your ice maker working well. You want to avoid leaks and clogs. Here are the steps you should follow:
- Find the drainpipe location. Make sure it is easy to reach for cleaning.
- Connect the ice maker’s drain hose to the drainpipe. Push the rubber end over the hose barb and secure it with zip ties.
- Do not install the drain line uphill. Water must flow down and away from the ice maker.
- If your drain is higher than the ice maker’s outlet, use a drain pump.
- Check all connections for leaks. Tighten or adjust as needed.
- Inspect the drain line regularly to keep it clear of clogs.
Tip: Always follow the manufacturer’s instructions for drain line setup. This helps you avoid common mistakes like using the wrong drain type or making loose connections.
Making Electrical Connections
You need to connect your under-counter ice maker to power safely. Use a dedicated 120V AC outlet with proper grounding. Here are some safety tips:
- Plug the ice maker into a grounded, three-prong outlet.
- Do not use extension cords or adapters.
- Keep the outlet dry and away from water sources.
- If your outlet has a ground fault interrupter (GFI), know that moisture can cause it to trip. If this happens, check for wet parts or shorted components.
- Make sure you know if your ice maker uses AC or DC power. GFI devices do not detect DC faults.
⚡ Always turn off the power before working with electrical connections. This keeps you safe during installation.
Securing the Ice Maker
You want your under-counter ice maker to stay in place and run quietly. Follow these steps to secure it:
- Place the ice maker on a stable, level surface. Use a spirit level to check.
- Use the mounting hardware that comes with your ice maker. Tighten all bolts and screws.
- Put rubber pads under the unit to reduce vibration.
- Keep the ice maker a few inches away from walls or cabinets to prevent noise.
- Check for any wobble or imbalance. Adjust the feet or base as needed.
- Test the ice maker after installation. Listen for unusual sounds or vibrations.
Note: A secure and level ice maker lasts longer and makes less noise.
Finishing Touches for Under Counter Ice Makers
Panel and Cabinet Integration
You can achieve seamless integration beneath the counter by planning your installation carefully. Start by measuring your cabinet space with precision. This ensures your ice maker fits with enough room for the door to open and for air to circulate. Here are the most effective steps for kitchen integration:
- Choose a location with easy access to water and a grounded outlet.
- Secure the water supply and drain lines to prevent leaks.
- Attach any kickplates or hinge covers that come with your unit.
- Use panel-ready models to add custom cabinet fronts. This helps your ice maker blend with the rest of your kitchen.
Tip: Custom cabinet panels create a streamlined and unobtrusive appearance, making your ice maker look like part of your cabinetry.
Regular cleaning of the ice bin and water lines keeps your machine running well and looking great.
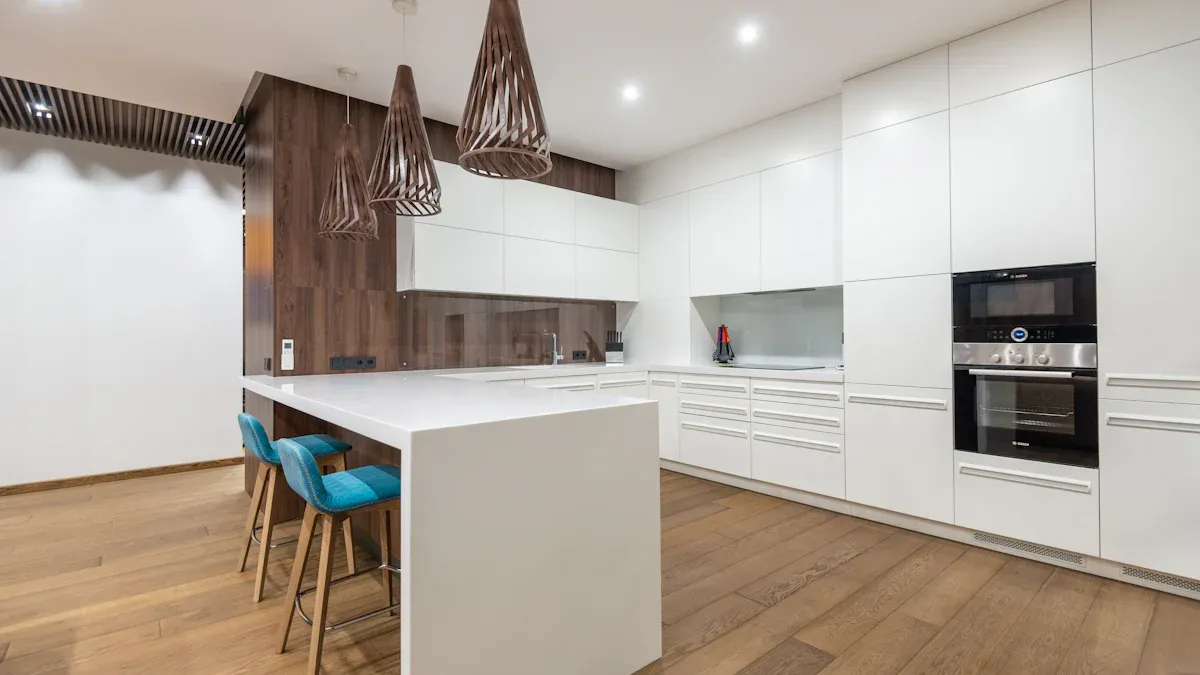
Matching Kitchen Design
You can match your under counter ice maker to any kitchen style. Many brands offer panel-ready units that let you use the same material as your cabinets for the front of the ice maker. This creates strong kitchen integration and a unified look. You might choose stainless steel to match other appliances, or select a custom finish for a unique touch.
- Pair white cabinets with white appliances for a seamless look.
- Use matte black with wood cabinets for contrast.
- Select brushed stainless steel for a modern feel.
Luxury brands like Sub-Zero, JennAir, and Thermador offer flexible options for kitchen integration. Early planning with an appliance expert helps you avoid design conflicts and ensures your ice maker fits both your space and your style.
Maximizing Space and Efficiency with Under-Counter Ice Machines
Smart Placement Tips
You can boost convenience and save space by choosing the right spot for your under-counter ice maker. Place your ice maker in a kitchen island to create a central access point. This setup lets you serve drinks from multiple zones and improves your kitchen workflow. You can also install the ice maker in a bar area or butler’s pantry for discreet access and less noise. Use custom panels that match your cabinets to keep your kitchen looking neat. Make sure you leave at least 1/4 inch on the sides and 1 inch at the back for ventilation. Front-venting models work well in compact spaces. Pull-out drawers or nearby storage make it easy to grab ice and keep supplies close.
Tip: Combine your ice maker with a beverage station or wine fridge to maximize utility in modern kitchens.
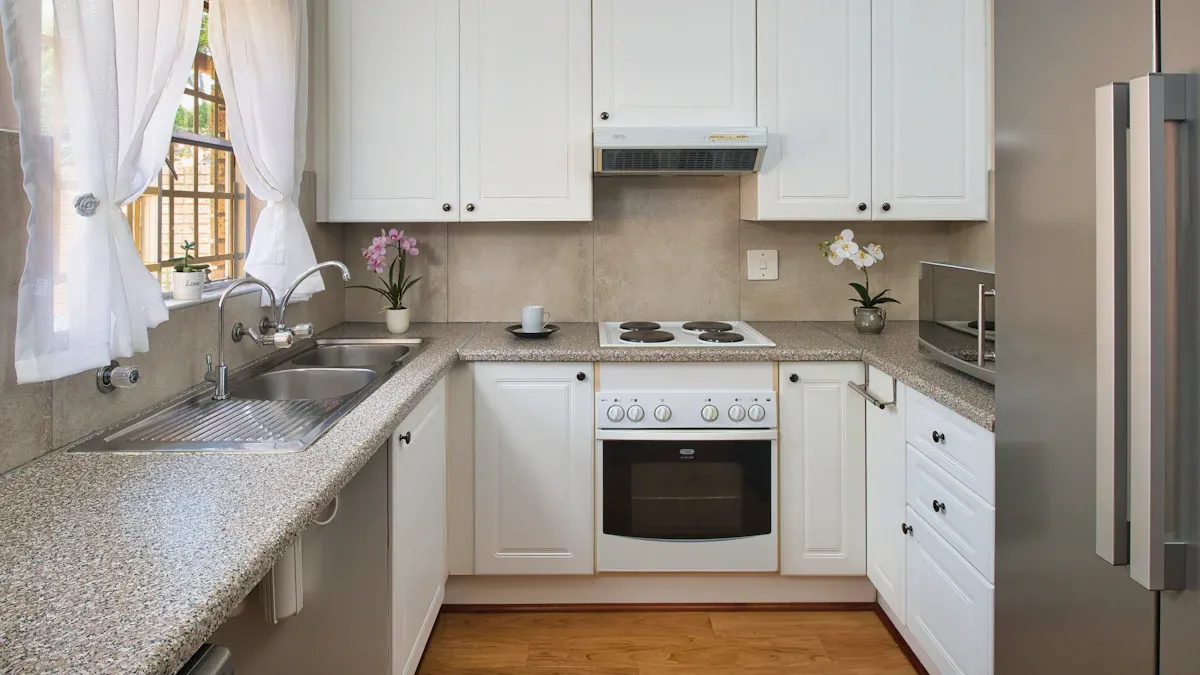
Organizing Surrounding Cabinets
You can organize your cabinets to make your kitchen more efficient. Start by finding unused spaces below cutting boards or above pantries. Measure your cabinets and add storage containers or custom inserts where needed. Keep items you use often within reach and store less-used items higher up. Pull-out shelves and corner lazy Susans help you use every inch of space. Create hidden appliance garages to keep counters clear but still have quick access to your ice maker. Built-in features like knife blocks and cutting board slots add convenience. Set a routine to tidy and reassess your cabinets so you keep everything organized.
- Take inventory of your kitchen tools.
- Use adjustable shelves for appliances of different sizes.
- Make zones for drinks, cooking, and snacks.
- Add in-cabinet lighting for better visibility.
Keeping the Area Clutter-Free
You can keep the area around your ice maker tidy with a few simple tools. Use baskets, dividers, and racks to organize supplies and keep them off the counter. Hang shelves near your work area to lift items up and free space. Install utensil racks under cabinets for easy access. Try using sliding drawers in under-sink cabinets for extra storage. Ice bins and accessories designed for under-counter ice makers help you stay organized. These strategies make your kitchen more convenient and help you enjoy a clutter-free space.
Note: Regularly check your storage solutions to make sure everything stays neat and easy to find.
Maintenance Tips for Under Counter Ice Makers
Regular Cleaning and Care
You keep your under counter ice maker working well by following a regular cleaning routine. Clean and sanitize the machine at least every six months, or more often if you use it daily or have hard water. Use only manufacturer-approved cleaners and a food-safe sanitizer. Remove the ice bin and empty any remaining ice. Take out removable parts like scoops and grids. Wash these parts with cleaner or a diluted vinegar solution, then rinse and dry them before putting them back.
Start the cleaning cycle by adding the recommended solution to the water reservoir. Run the cleaning cycle, then rinse with fresh water. Replace the water filter every six months to prevent scale and bacteria buildup. Clean the condenser coils regularly to stop overheating and keep the machine efficient. Schedule professional maintenance twice a year for inspection and servicing.
Tip: Keep the area around your ice maker clean and make sure there is enough ventilation. This helps prevent dust and debris from affecting performance.
Preventing Common Issues
You can avoid most problems with your ice maker by practicing good maintenance. Common issues include no ice production, strange noises, water leaks, and poor ice quality. Use filtered water to improve ice taste and shape. Clean and sanitize the machine and accessories often to prevent residue and contamination. Check and clean water inlet filters to keep water flowing smoothly.
- Inspect water lines and hoses for leaks.
- Clean dust from condensers and ensure proper airflow.
- Handle all parts with care to maintain hygiene.
- Reset the machine seasonally and seek professional help for persistent problems.
Proper installation and regular care help your ice maker last longer, sometimes up to 30 years. You protect your investment and enjoy fresh ice every day by following these simple steps.
You gain many benefits when you install an under counter ice maker.
- You enjoy high daily ice production and large storage capacity.
- Automatic shutoff saves energy.
- Filtered clear ice tastes fresh.
- Easy access bins and drop-down doors improve usability.
Follow these steps to keep your ice maker working well:
- Clean the machine monthly with approved cleaners.
- Replace the water filter every six months.
- Schedule professional maintenance twice a year.
- Keep the area clean and well ventilated.
FAQ
How often should you clean your under-counter ice maker?
You should clean your ice maker every six months. If you use it daily or have hard water, clean it more often for best results.
Can you install an under-counter ice maker by yourself?
You can install it if you have basic plumbing and electrical skills. For complex setups, you should hire a professional to ensure safety and proper function.
What type of water filter works best for ice makers?
Use a filter designed for ice makers. It removes minerals and impurities, which helps your machine last longer and keeps your ice clear and fresh.