Skip to content
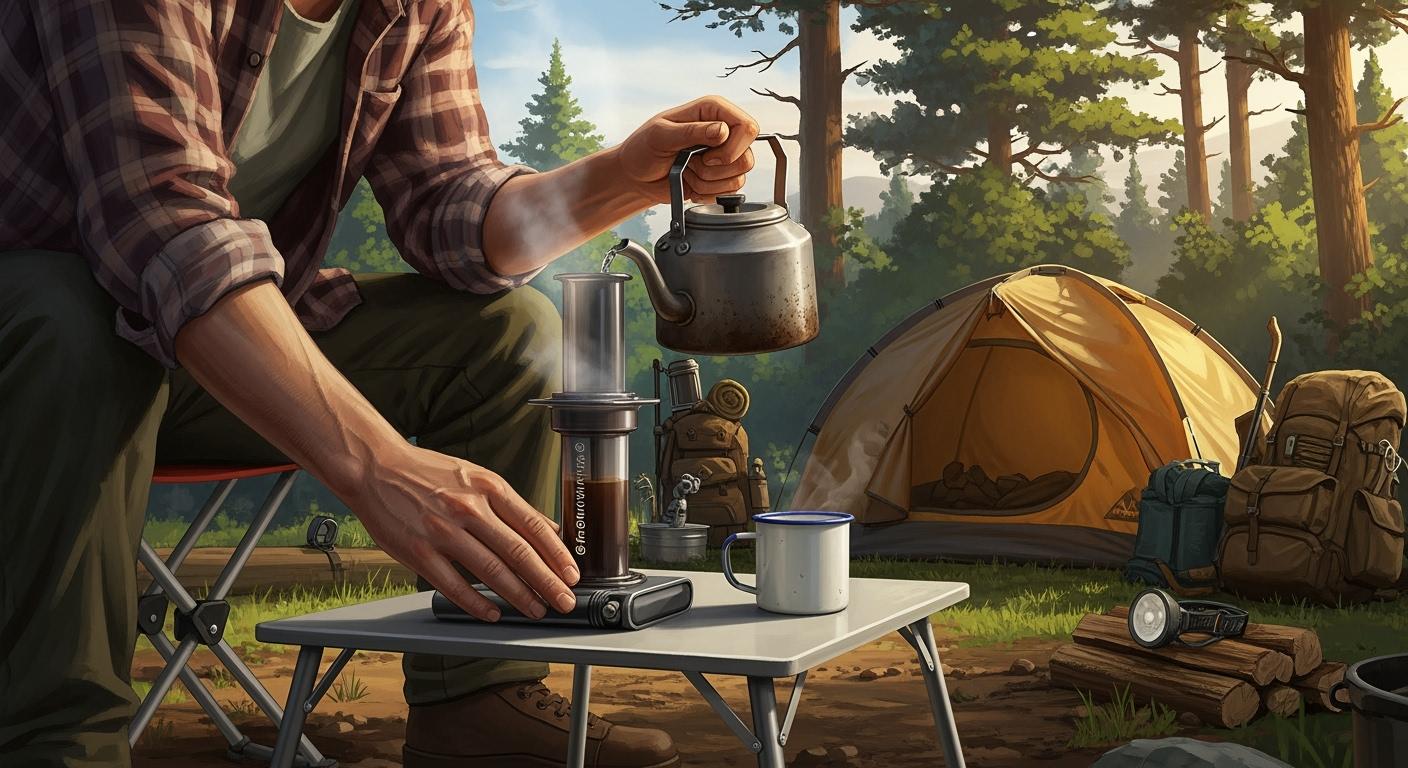
You just need your portable coffee maker, hot water, and your favorite coffee grounds. Making coffee outdoors feels easy and fun. You get to enjoy a fresh cup while listening to birds or watching the sunrise.
Camping coffee tastes better because you make it yourself!
Key Takeaways
Pick a portable coffee maker that matches your camping needs. You can use an AeroPress or a French press. Each one makes coffee in its own way.
Bring important items like a reusable coffee filter. Use an airtight container for your coffee beans. This helps your coffee stay fresh. It also cuts down on trash.
Use easy steps to make coffee outside. Warm up your equipment first. Measure your coffee before you brew. Drink your fresh coffee and enjoy the outdoors.
Portable Coffee Maker Options
Types for Camping
You have plenty of choices when it comes to portable coffee makers for camping. Each type has its own perks, so you can pick what fits your style best. Here are some popular options:
Starbucks VIA: Super light and easy. You just add hot water—no need for filters or grinders.
ESPRO Ultralight Travel Press Bottle: This bottle fits in your backpack and won’t leak. You brew and drink from the same container.
GSI Outdoors Ultralight Java Drip: Works like a French press and doubles as a travel mug. You get quick brewing and easy sipping.
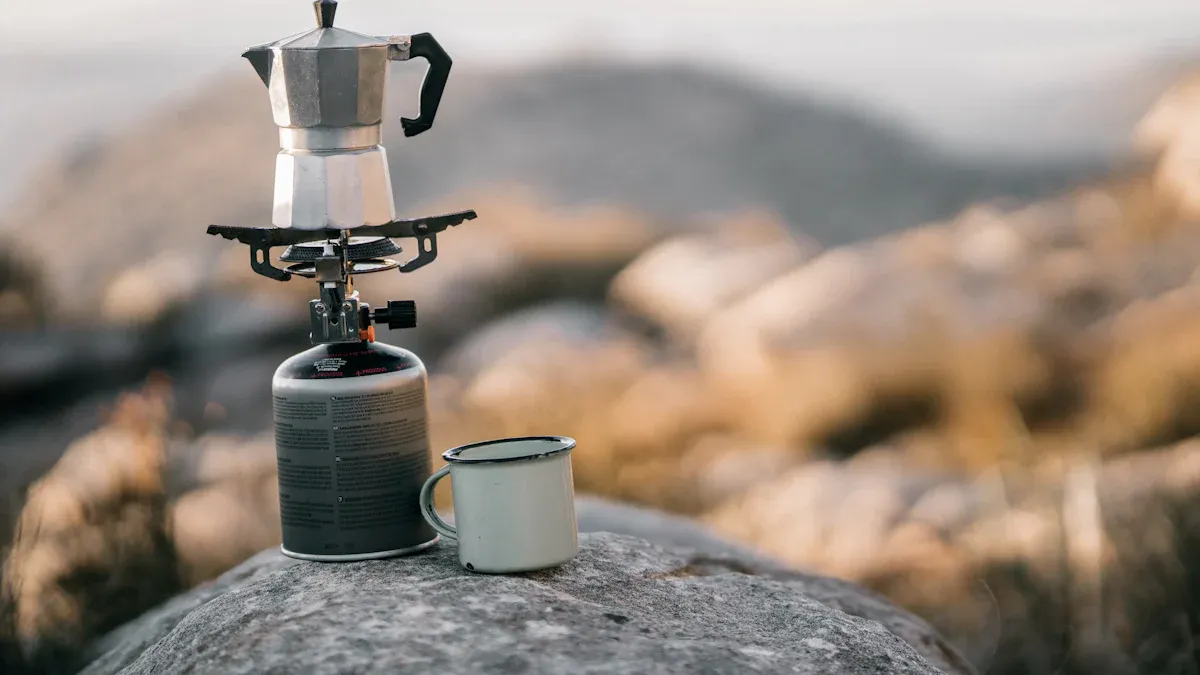
Bialetti Moka Express: Classic espresso maker. You set it up while making breakfast and let it do its thing.
Wacaco Minipresso GR: Makes espresso fast. You need hot water, but it’s ready in about a minute.
Tip: If you want a coffee maker that does double duty as a mug, look for travel presses. They save space and make cleanup easier.
Choosing the Right One
Picking the best coffee maker for your trip depends on a few key things. Here’s what you should think about:
Factor | Why It Matters |
|---|---|
Durability | Handles bumps and rough weather |
Size and Weight | Easy to carry and pack |
Brewing Method | Matches your taste and time needs |
Ease of Use | Simple steps for busy mornings |
Cleaning & Maintenance | Stays fresh and lasts longer |
Gear Compatibility | Works with your stove or camp setup |
You might like the AeroPress for quick brewing and easy cleaning. The Wacaco Minipresso gives you control and fits in your hand. Bodum Travel Press lets you brew and drink from one mug. Hamilton Beach FlexBrew is great if you want options for single cups or a full pot. Nespresso Essenza Mini is perfect if you love espresso and want something compact.
Remember: Choose a coffee maker that matches your camping style. If you hike a lot, go light. If you camp with friends, pick one that makes more coffee at once.
Essential Gear and Ingredients
What to Pack
Packing the right gear makes your camp coffee routine smooth and enjoyable. You want tools that fit your style and keep things simple. Here’s a quick look at popular coffee makers and who they suit best:
Gear Type | Best For |
|---|---|
Percolator | Car campers and those who want to upgrade from cowboy coffee |
Portable Espresso Maker | Coffee lovers who need extra caffeine in the morning |
Pour-over Coffee Maker | All camping styles and preferences |
French Press | Fans of rich, full-bodied coffee |
Don’t forget a reusable coffee filter. Cotton filters cut down on waste and help protect the outdoors. You also help the planet by using less paper and keeping trash out of landfills. If you want to keep your beans fresh, use an Airscape Coffee Canister for car camping or an airtight bag for backpacking. Keep your coffee away from air and moisture for the best flavor.
Tip: Pack a sturdy mug, a spoon, and a small towel for easy cleanup.
Water and Coffee Choices
Water and coffee are the heart of a delicious cup of coffee. Clean water pulls out the best flavors from your grounds. Try to use water with balanced minerals and a pH level that isn’t too high or low. Water with a TDS between 75 and 100 ppm gives you a smooth taste. The minerals in water, like calcium and magnesium, can make your coffee taste brighter or richer. You’ll notice different flavors if you use water from a stream, a bottle, or your tap at home.
Choose high-quality coffee beans—the same ones you love at home. You’ll get a delicious cup of coffee even in the wild. Protect your beans from moisture and air so every brew tastes fresh.
Note: Reusable filters help you leave no trace and enjoy your coffee with less guilt.
Prep Before Brewing
Setting Up Camp Coffee
Getting ready to brew coffee at your campsite feels exciting. You want everything set up so you can enjoy your first cup without stress. Here’s a simple way to get started:
Set up your portable gas stove and check that it works. If it’s chilly, shake the gas bottle and wrap it in something warm.
Fill your percolator with water and preheat it on your portable gas stove. Hot water helps you control the flavor.
Measure out your coffee and grind it to a medium-coarse texture. Use enough for the number of servings you want.
Put the ground coffee in the filter basket. Spread it out evenly.
Place the percolator on your portable gas stove. Heat it until the water boils, then lower the heat and let it brew for about ten minutes.
Remove the filter basket and turn off the stove. Dispose of the used grounds in a responsible way.
Let the coffee sit for a few minutes, then pour it into your mug and enjoy.
Tip: Preheating your percolator makes your coffee taste smoother and keeps it hot longer.
Heating Water Methods
You have several ways to heat water while camping. Each method has its own pros and cons. Here’s a quick look:
Method | Pros | Cons |
|---|---|---|
Spardar Car Kettle | No fire risk, plugs into car | Slow to boil, costs more |
Camping Stove | Reliable, great for backpacking | Needs fuel, can be bulky |
Bucket Heaters | Good for groups, no fire risk | Needs power, slow heating |
Flameless Ration Heaters | Easy, no flames | Doesn’t purify water, slow |
Safety matters when you heat water outdoors. Always:
Use heaters on surfaces that won’t catch fire.
Watch your heater while it’s running.
Look for automatic shutoff features.
Make sure you have good ventilation.
Use propane heaters outside only.
Note: Never leave your heater alone. Staying close keeps you and your campsite safe.
How to Make Coffee While Camping
Using a Portable Coffee Maker
You can enjoy a fresh cup of coffee while camping with just a few simple steps. Your portable coffee maker makes the process easy, even if you’re new to brewing outdoors. You don’t need fancy gear or a big kitchen. You only need your favorite coffee grounds, clean water, and a reliable way to heat it.
Here’s how you can get started:
Choose your portable coffee maker. Pick one that fits your camping style. Some popular options include AeroPress Go, GSI Outdoors Ultralight Java Drip, and YETI Rambler French Press. If you camp with friends, the GSI Outdoors Glacier Stainless-Steel 6-Cup Percolator brews enough for everyone.
Heat your water. Use a portable burner, car-powered kettle, or a camp stove. If you want a safe option without fire, try a car-powered device. Always keep your heater on a stable surface and watch it while it runs.
Prepare your coffee grounds. Grind your beans before you leave home or use pre-ground coffee. Store them in an airtight container to keep them fresh.
Set up your brewing station. Find a flat spot at your campsite. Lay out your mug, coffee maker, and spoon.
Brew your coffee. Follow the steps for your chosen method. Each portable coffee maker has its own process, but you’ll get the hang of it quickly.
Tip: If you want to make camp coffee with less mess, use a travel press or pour-over system. These options keep cleanup simple and save space in your pack.
Brewing Methods (AeroPress, Percolator, Press Pot, Cold Brew)
You have several ways to make coffee while camping. Each method gives you a different flavor and experience. Let’s break down the steps for each one.
AeroPress
The AeroPress is a favorite for campers who want quick, strong coffee. You can use it almost anywhere. Here’s how you use it at your campsite:
Rinse the paper filter with hot water to remove any papery taste and warm up the brewer.
Attach the filter to the brew chamber and place it on a sturdy mug.
Weigh and grind your coffee to a medium-fine consistency.
Use a funnel to add the coffee to the brew chamber.
Pour about 35 grams of hot water into the chamber and stir to saturate the grounds.
Wait one minute, then add 215 grams of hot water. Stir gently for 10 seconds.
Insert the plunger into the chamber to prevent dripping.
Let the coffee brew for 2 to 4 minutes, depending on how strong you like it.
Slowly press the plunger down to extract your coffee.
Tip: The AeroPress Go includes a cup that doubles as a brewing vessel. It’s perfect for portability and easy cleanup.
Percolator
If you want the classic camping coffee experience, try a percolator. This method works well for groups and gives you rich, bold coffee.
Fill the percolator with clean water.
Add medium-coarse ground coffee to the filter basket.
Place the percolator on your camp stove or portable burner.
Heat until the water starts to bubble up through the grounds.
Lower the heat and let it brew for about 10 minutes.
Remove from heat and let it sit for a few minutes.
Pour and enjoy.
Note: The GSI Outdoors Glacier Stainless-Steel 6-Cup Percolator is great for brewing multiple cups at once.
Press Pot (French Press)
A press pot, also called a French press, gives you full-bodied coffee. It’s simple and doesn’t need paper filters.
Add coarsely ground coffee to the press pot.
Pour hot water over the grounds.
Stir gently and place the lid on with the plunger pulled up.
Let the coffee steep for 4 minutes.
Slowly press the plunger down.
Pour your coffee into a mug.
Tip: The YETI Rambler French Press keeps your coffee hot and is easy to use outdoors.
Cold Brew
Cold brew is a great choice if you want smooth coffee and don’t want to heat water. You prepare it ahead of time and enjoy it chilled.
Advantages | Disadvantages |
|---|---|
Easy preparation by steeping grounds in cool water for 12–24 hours | Requires advance planning for steeping time |
No heat required, making it safe for camping | May not suit those who prefer hot coffee |
Smooth, low-acidity flavor profile | Limited flavor complexity compared to hot brews |
Refreshing option on warm days | Requires additional mixing with water or milk |
To make cold brew:
Add coarsely ground coffee to a jar or bottle.
Pour cool, clean water over the grounds.
Stir and seal the container.
Let it steep for 12 to 24 hours.
Strain the coffee and serve over ice or mix with milk.
Tip: Cold brew is perfect for hot days when you want a refreshing drink. You don’t need a fire or stove, so it’s safe and simple.
You can make coffee while camping with any of these methods. Your portable coffee maker helps you enjoy fresh coffee wherever you set up camp. Try different brewing styles to find your favorite. You’ll discover that making coffee outdoors is easy and rewarding.
Coffee Tips and Troubleshooting
Improve Taste and Strength
You want your coffee while camping to taste amazing, right? Here are some easy ways to boost flavor and strength:
Try using more coffee grounds. This makes your brew richer and stronger.
Pick a brewing method that matches your taste. French press gives you bold flavor, while pour-over is lighter.
Choose beans that fit your style. Robusta beans pack more caffeine, but Arabica beans taste smoother.
Adjust your grind size. Finer grinds work for quick methods like espresso. Coarser grinds are better for French press or cold brew.
Let your coffee steep longer if you want a stronger cup. Cold brew needs 12 to 24 hours for full flavor.
Tip: Always use fresh beans and grind them right before brewing. Pre-ground coffee loses its flavor fast.
Common Problems and Fixes
Sometimes things go wrong with camp coffee. Don’t worry—you can fix most issues with a few simple steps.
If you leave coffee sitting in hot water after brewing, it keeps extracting and gets bitter. Pour it out right away or use a thermos to keep it warm.
Weak coffee? You might not use enough grounds or brew long enough.
Bitter taste? Over-extraction or grinding too fine can cause this.
Grounds in your cup? Over-boiling or using the wrong grind size may be the problem.
Pre-ground coffee loses flavor quickly. Freshly ground beans taste best.
Quick Fixes for Weak or Bitter Coffee:
Use the right coffee-to-water ratio—about 2 tablespoons per 6–8 oz of water.
Match grind size to your brewing method.
Heat water to 195°F–205°F.
Brew for the recommended time.
Clean your coffee maker after each use.
Description | |
|---|---|
Regular Cleaning | Wash after every use to keep flavors fresh. |
Fresh Water Usage | Use clean water each time you brew. |
Proper Storage | Dry your gear before packing it away. |
You can make great coffee at camp with just a few steps. Try different brewing styles to match your taste and trip. Check out this table for quick tips:
Group | Best Use |
|---|---|
Hikers | Fast espresso, easy mornings |
Road Trippers | Scenic stops, better flavor |
Group Campers | Solo shots, simple setup |
Enjoy every sip and let coffee be the highlight of your camping trip! ☕🌲
FAQ
How do you clean your portable coffee maker at camp?
You rinse it with hot water. Use a small brush for stubborn grounds. Dry all parts before packing. Quick cleaning keeps your coffee tasting fresh.
Can you use instant coffee with a portable coffee maker?
You can use instant coffee. Just add hot water to your mug. You skip the brewing step and cleanup. It’s fast and easy for busy mornings.
What if you forget your coffee filters?
Try using a clean bandana or paper towel as a filter. You can also brew cowboy coffee by letting grounds settle before pouring.