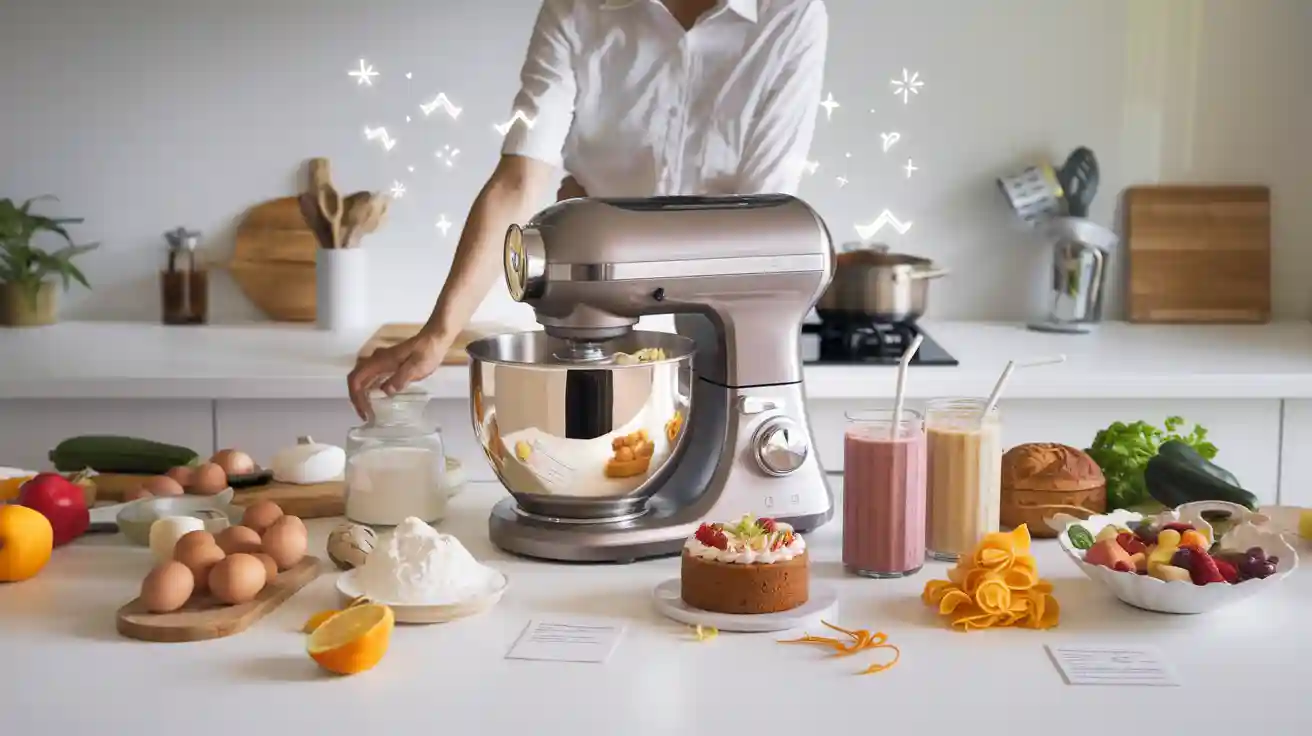
When you use mixers food, you unlock more than just baking power. Your stand mixer can handle daily recipe prep with ease. It saves time by letting you multitask as it mixes, kneads, or whips. Discover creative ways to use your mixer and bring new life to food in every recipe.
Shred Cooked Chicken or Pork with Your Kitchenaid Mixer
Quick Pulled Meat for Tacos and Sandwiches
You can turn a busy weeknight into a breeze when you use your Kitchenaid mixer for shredding cooked chicken or pork. Instead of spending ages with two forks, let your mixer do the heavy lifting. Just drop warm, boneless meat into the bowl, attach the flat paddle, and set it to low. In less than a minute, you get perfectly shredded meat for your favorite tacos, sandwiches, or salads.
Take a look at how the Kitchenaid mixer compares to other methods:
| Aspect | KitchenAid Stand Mixer Shredding | Manual Shredding | Alternative Methods (Food Processor, Blender, Hand Blender) |
|---|---|---|---|
| Speed | 30 to 60 seconds on low speed | More time-consuming | Food processor slower and requires careful pulsing; blender not recommended |
| Consistency | Produces finely shredded, uniform pieces | Can be uneven pieces | Food processor may crumble; blender chops or purees instead of shredding |
| Effort | Minimal effort required | Requires physical effort | Hand blender takes longer and can be messier |
| Recommended Attachment | Flat beater or pastry beater | N/A | Food processor slicer blade recommended; blender not recommended |
| Meat Condition | Best with warm, boneless, skinless meat | N/A | Food processor requires gentle pulsing; blender unsuitable |
| Manual Intervention | Only if large pieces remain, can break apart by hand | N/A | N/A |
| Overall Benefit | Quick, efficient, consistent shredding improving meal prep | Slower, inconsistent | Risk of over-processing or poor texture |
You get fast, even results every time. No more tired arms or uneven chunks!
Save Time on Meal Prep
You can save a lot of time when you use your stand mixer for shredding cooked pork or chicken. Here’s how you do it:
- Cut the cooked meat into chunks that fit easily in your mixer bowl.
- Place the chunks in the bowl and attach the flat paddle.
- Set your mixer to the “stir” or low speed.
- Watch as the mixer shreds the meat in seconds.
- Stop when you reach the texture you want for your recipe.
This method works for chicken, pork, beef, or turkey. You can even use it for large batches, making meal prep for the week much easier. If you want to avoid a mess, remove extra sauce before shredding. You can use this trick for many types of food, and it helps you get dinner on the table faster.
Tip: Always keep an eye on the mixer so you don’t over-shred and turn your meat into a paste.
Make Fluffy Mashed Potatoes Using Mixers Food
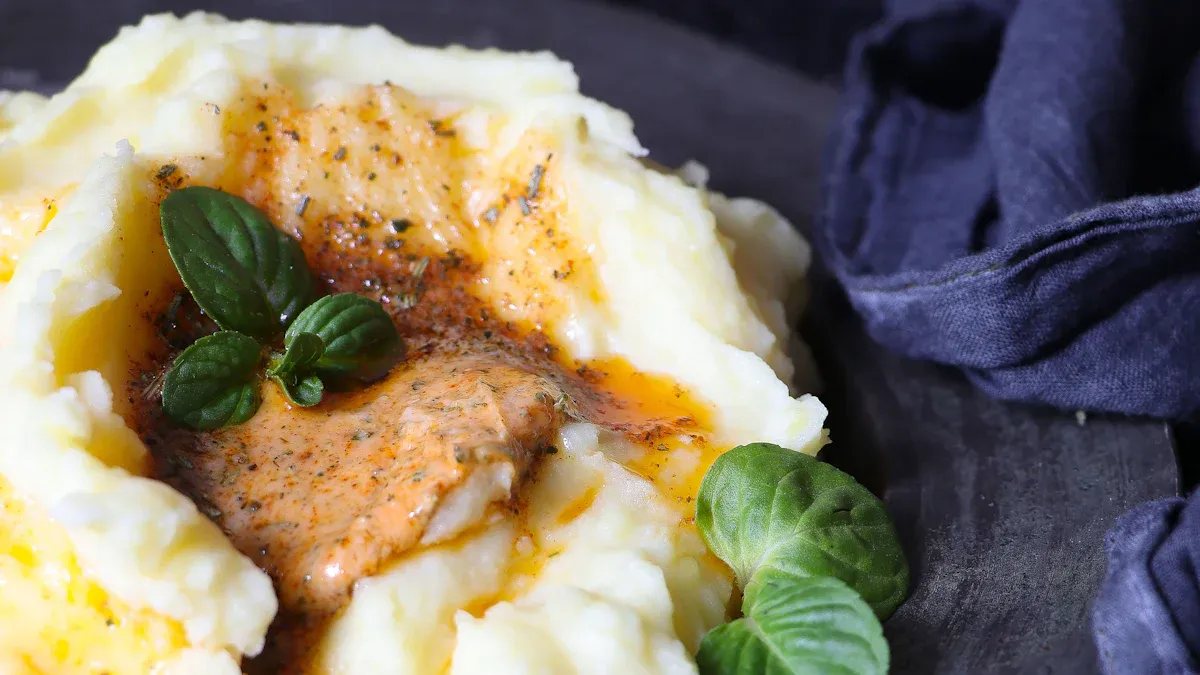
Creamier Texture with Less Effort
You want mashed potatoes that are smooth and fluffy, right? Your mixer can help you get there fast. When you use a stand mixer, you save time and effort compared to mashing by hand. Just boil your potatoes, drain them, and let your mixer do the work. The paddle attachment whips the potatoes quickly, giving you a light and creamy texture. Hand-mashing takes more time and leaves you with a chunkier, rustic feel. With a mixer, you get a bowl of mashed potatoes that feels like a cloud—perfect for any meal.
Tip: Don’t overmix! If you mix too long, the potatoes can turn gummy. Watch closely and stop when they look fluffy.
Add-Ins for Extra Flavor
You can make your mashed potatoes taste amazing with a few simple add-ins. Culinary experts love using cream cheese or Greek yogurt for extra creaminess and a little tang. Salted butter brings out the flavor in every bite. Want to get creative? Try adding roasted garlic, chives, or even crispy bacon. Your mixer blends these ingredients evenly, so every spoonful tastes great.
Here’s a quick look at popular add-ins you can try in your next recipe:
| Category | Popular Add-ins Examples |
|---|---|
| Vegetables | Roasted garlic, green onion, caramelized onions, cauliflower |
| Herbs | Chives, parsley, rosemary, dill |
| Spices | White pepper, garlic powder, paprika, cajun seasoning |
| Cheeses | Parmesan, goat cheese, blue cheese, smoked gouda |
| Sauces & Liquids | Buttermilk, sour cream, browned butter, chicken stock |
| Meats | Bacon, pancetta, prosciutto |
You can mix and match these to fit your taste or the food you’re serving. Your mixer makes it easy to blend everything together for the best mashed potatoes every time.
Whip Up Homemade Butter with a Stand Mixer
Fresh Butter in Minutes
You might think making butter at home takes a long time, but your mixer changes everything. With a stand mixer, you can turn heavy cream into fresh butter in less than 10 minutes. Just pour cold cream into the bowl, attach the whisk, and let the mixer run on medium speed. In about three minutes, you’ll see the butter fat start to separate from the buttermilk. Keep mixing until the butter clumps together. This method is much faster and easier than shaking a jar by hand, which can take up to 25 minutes and leave your arms tired.
Tip: After the butter forms, pour off the buttermilk and rinse the butter with cold water. This step helps your butter last longer and taste fresher.
Here’s a quick comparison to show how much time you save:
| Method | Time Needed | Effort Level |
|---|---|---|
| Traditional Shaking | 20-25 minutes | High |
| Stand Mixer (KitchenAid) | Less than 10 min | Low |
Customize with Herbs or Spices
Once you have your homemade butter, you can make it your own. The most popular way is to add salt. Large-grain salt, like Maldon, gives a nice crunch and brings out the flavor. You can also mix in fresh herbs, spices, or even black garlic for a special touch. Try adding chopped chives, parsley, or a pinch of smoked paprika. Always add these extras after you rinse the butter, so they blend in well.
- Common add-ins for homemade butter:
- Salt (especially large-grain)
- Fresh herbs (chives, parsley, dill)
- Spices (paprika, garlic powder)
- Black garlic
Note: Adding herbs or spices makes your butter taste amazing, but it may not last as long in the fridge. Make small batches and enjoy them fresh!
With your mixer, you can whip up custom butter for toast, veggies, or even steak. It’s a simple way to make everyday meals feel special.
Mix Meatballs or Meatloaf—Creative Ways to Use Your Mixer
Evenly Combined Ingredients
When you make meatballs or meatloaf, you want every bite to taste the same. Your mixer helps you get there. The paddle attachment on your stand mixer mixes everything together quickly and evenly. You just add your ground meat, breadcrumbs, eggs, and seasonings to the bowl. Start the mixer on low speed. The paddle moves through the mixture, making sure all the ingredients blend well. This method works better than mixing by hand, especially if you want to avoid cold, sticky fingers.
- Using a mixer gives you a smoother, almost pâté-like texture. Some people love this because it holds together well and feels soft when you eat it.
- The mixer helps develop myosin protein in the meat. This protein acts like glue, so your meatballs or meatloaf do not fall apart during cooking.
- If you like a chunkier, more rustic texture, you might still prefer hand mixing. It is all about what you enjoy most in your recipe.
Tip: Keep your meat and other ingredients cold before mixing. This helps the fat stay firm and keeps your mixture from getting greasy.
Less Mess, More Flavor
Mixing meatballs or meatloaf by hand can get messy fast. Your mixer keeps your hands clean and your kitchen tidy. You just let the machine do the work. For best results, start by mixing the dry and wet ingredients without liquids. Then, slowly add any milk or broth while the mixer runs on low. This step-by-step process makes the mixture tacky and easy to shape.
You also get more flavor in every bite. The mixer spreads spices, herbs, and cheese evenly through the meat. You do not end up with bland spots or clumps of seasoning. Many cooks use a stand mixer for large batches or when they want to save time. You get great results with less effort, and your meatballs or meatloaf come out perfect every time.
Note: Do not overmix. Stop as soon as the mixture looks smooth and sticky. Overmixing can make your meatballs tough.
Prepare Pancake or Waffle Batter—Ways to Use a Stand Mixer
Lump-Free Batter Every Time
You want pancakes or waffles that turn out light and fluffy. A stand mixer helps you get there fast. When you use your mixer to mix batter, you do not have to worry about lumps. The mixer blends flour, eggs, milk, and sugar until the batter looks smooth. You just pour in your ingredients, turn on the mixer, and watch it work. No more tired arms from stirring by hand. You get even results every time, which means your homemade breakfast will taste great.
Tip: Start mixing on a low speed. This keeps flour from flying out of the bowl and helps you control the texture.
Easy Additions for Variety
You can make your breakfast special by adding fun mix-ins to your batter. Many people love fruit pancake mixes, like blueberry or raspberry. These fruits add a burst of flavor and color to your recipe. Your mixer makes it easy to fold in sliced fruit, chocolate chips, or even nuts. If you want to get creative, try using the mixer’s attachments to slice or spiralize fruit or chop nuts before adding them to the batter.
Here are some popular mix-ins you can try:
- Sliced fruit (like blueberries or bananas)
- Chocolate chips
- Spices (such as cinnamon)
- Nuts
You can add these to your batter right before cooking. This way, every bite has a little surprise. Your mixer helps you blend everything evenly, so your pancakes or waffles always turn out delicious. Try new combinations to keep your homemade breakfast exciting and fresh.
Knead Bread or Pizza Dough with a Kitchenaid Mixer
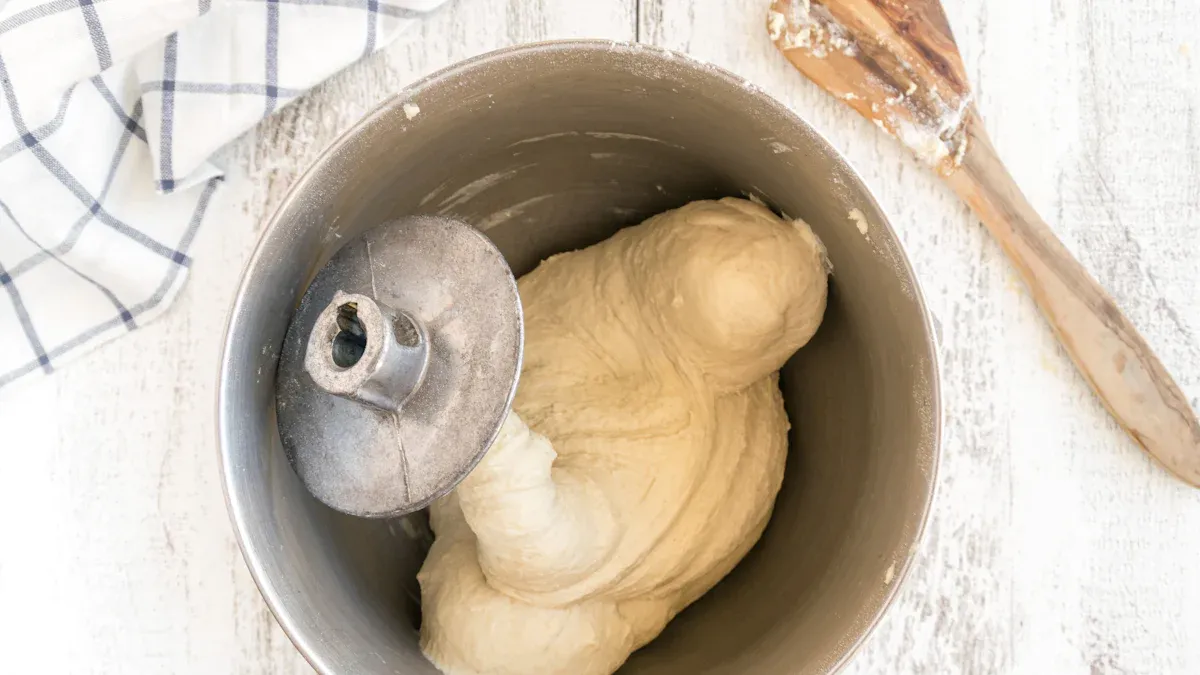
Hands-Free Kneading
Making bread or pizza dough by hand can wear you out fast. When you use a Kitchenaid mixer, you let the machine do the hard work. Just add your ingredients to the bowl, attach the dough hook, and turn on the mixer. You can watch as the dough comes together without getting your hands sticky or tired. Most people find that kneading pizza dough with a mixer takes only about 8 minutes, while hand kneading can take up to 25 minutes. That means you save a lot of time and effort. You can even use this time to prep toppings or clean up your kitchen.
Tip: Always start your mixer on a low speed. This keeps flour from flying out and helps the dough mix evenly.
Consistent Results
You want your pizza dough to turn out perfect every time. The mixer helps you get there. The dough hook works the dough quickly, building strong gluten strands. This gives your dough the stretch and chew you love in a good pizza crust. When you use a stand mixer, you get a smooth, elastic dough that springs back when you press it. You can even check your dough with the windowpane test—stretch a small piece and see if it forms a thin, see-through sheet. If it does, your dough is ready for your favorite recipe. Just be careful not to over-knead, since the mixer works fast. Stop as soon as the dough looks smooth and bouncy.
Using a mixer for pizza dough means less mess, less effort, and more time to enjoy making food with your family.
Make Creamy Dips and Spreads—Mixers Food for Entertaining
Smooth Hummus or Bean Dip
You can make smooth hummus or bean dip at home with your mixer. Just add cooked chickpeas or beans, a little olive oil, lemon juice, and your favorite spices to the bowl. Turn on the mixer and watch as it blends everything into a creamy dip. You do not need to worry about lumps or uneven texture. The mixer does the hard work for you. If you want your hummus extra smooth, let the mixer run a bit longer. You can also add roasted garlic, sun-dried tomatoes, or fresh herbs for more flavor. Serve your mixed dips with pita chips or fresh veggies for a snack everyone will love.
Tip: If your dip seems too thick, add a splash of water or olive oil while mixing. This helps you get the perfect creamy texture.
Whipped Cream Cheese Spreads
Cream cheese spreads are always a hit at parties. Your stand mixer makes them easy to prepare. Start by letting your cream cheese soften a bit. Then, use the paddle attachment to whip it until it is light and fluffy. This step is important because cold cream cheese can be hard to mix by hand. The mixer warms it up and blends in your favorite add-ins, like chives, smoked salmon, or roasted peppers. You can even try making delicious dips like Million Dollar Dip or Buffalo Chicken Dip. Mixing dips with a mixer gives you a smooth, spreadable texture every time.
- Popular cream cheese-based dips you can make:
- Million Dollar Dip
- Buffalo Chicken Dip
- Artichoke Dip
- Queso Dip
You can serve these spreads with crackers, bagels, or fresh bread. Your guests will ask for your secret!
Whip Cream or Meringue—Creative Ways to Use a Stand Mixer
Perfect Peaks in Minutes
You want whipped cream or meringue that looks perfect and holds its shape. Your mixer makes this easy. When you use a stand mixer, you can whip cream or egg whites much faster than by hand. For small batches, you get stiff peaks in just 1 to 2 minutes. If you have a large batch, it might take up to 15 minutes, but you still save time and effort.
Here’s a quick look at how long it takes to whip cream or meringue:
| Method | Batch Size | Average Time to Stiff Peaks |
|---|---|---|
| Stand Mixer | Small batch | 1 to 2 minutes |
| Stand Mixer | Large batch | 13 to 15 minutes |
| Hand Whisk | N/A | Not specified |
You can see that your mixer does the job quickly. You do not need to tire out your arms or worry about uneven results.
Tips for Stable Whipped Toppings
You want your whipped cream or meringue to stay fluffy and not melt away. Try these tips to make your toppings stable and long-lasting:
- Use your mixer with the whisk attachment for whipping heavy cream, vanilla, and powdered sugar.
- Slowly pour in melted, unflavored gelatin while the mixer runs. This helps the cream hold its shape.
- Keep mixing until you see medium-stiff peaks.
- Use your stabilized whipped cream right away for spreading or piping. It will set more in the fridge and last longer.
- You can also use pudding mix, cream cheese, mascarpone, crème fraîche, or yogurt as stabilizers.
Note: Instant ClearJel works best for keeping whipped cream fluffy for days. Crème fraîche and mascarpone also help, but yogurt and cornstarch do not work as well.
With these tricks, your desserts will look great and taste even better!
Make Homemade Ice Cream with Your Mixer
Simple Churning for Creamy Results
You can make homemade ice cream right in your kitchen using your stand mixer. This method feels easy and fun. First, freeze the special bowl for your mixer at least 24 hours before you want to make ice cream. When you are ready, pour your chilled ice cream base into the bowl and start churning. The mixer does all the hard work for you. It takes about 20 to 30 minutes to churn, and you will see the mixture turn light and creamy as air gets mixed in.
- The ice cream will look like soft-serve when you finish churning.
- If you want a firmer texture, put it in the freezer for 2 to 3 hours.
- Add your favorite mix-ins, like chocolate chips or nuts, after churning for the best texture.
Using a mixer is more convenient than old-fashioned ice cream makers. You do not need ice or salt, and cleanup is much easier. The process is faster, and you get creamy results every time.
| Aspect | Stand Mixer with Frozen Bowl | Traditional Ice Cream Maker |
|---|---|---|
| Preparation Time | Freeze bowl 24 hours, churn 25-30 min | Slower, needs ice and salt |
| Texture | Soft-serve, creamy, scoopable | Harder to get creamy texture |
| Convenience | Easy, less mess | More steps, more cleanup |
Tip: Always freeze your bowl ahead of time so you can make ice cream whenever you want!
Flavor Variations to Try
You can get creative with your mixer and try many different ice cream flavors. Start with a classic vanilla base, then add your favorite toppings or mix-ins. The mixer makes it easy to blend everything evenly.
Here are some popular flavors you can make at home:
| Flavor Variation | Description |
|---|---|
| Vanilla Bean | Classic, rich vanilla flavor with real vanilla seeds |
| Chocolate Peanut Butter | Creamy chocolate with swirls of peanut butter |
| Nutella | Sweet cream base with Nutella for a silky treat |
| Caramel Swirl | Vanilla ice cream with gooey caramel ribbons |
| Rocky Road | Chocolate, nuts, marshmallows, and chocolate chips |
| Mint Chip | Cool mint ice cream with mini chocolate chips |
| Cookie Monster | Vanilla base with chocolate chip cookies and Oreo pieces |
| Chunky Monkey | Bananas, walnuts, and chocolate chunks in sweet cream |
You can also try coffee toffee, butterscotch, or even chocolate fudge brownie. The mixer helps you blend in cookies, candies, or fruit without much effort. If you want to make ice cream for a party, let everyone pick their own mix-ins for a fun treat.
Try making a new flavor each week. You might discover a new favorite!
Prepare Marshmallows and Other Treats—Ways to Use a Stand Mixer
Fluffy Homemade Marshmallows
You can make marshmallows at home that taste better than anything from the store. Your stand mixer makes this possible. When you pour hot syrup into the bowl and let the mixer whip, you get a fluffy, light texture. The process takes about 10 to 20 minutes of whipping. If you try to do this by hand, it gets tiring fast. The syrup is hot and sticky, and you need to whip for a long time. With a stand mixer, you just turn it on and let it work. You do not have to worry about the heat or getting tired arms. Most people find that using a stand mixer gives them a higher chance of success. You get perfect marshmallows with less effort and more comfort.
Tip: Dust your finished marshmallows with powdered sugar so they do not stick together.
Mixing for Granola Bars and More
Your stand mixer is not just for marshmallows. You can use it to make many other treats. Try mixing up granola bars by adding oats, honey, and your favorite nuts or dried fruit. The mixer blends everything evenly, so every bar tastes great. You can also make cakes, cookies, and frostings with your stand mixer. Some popular treats include Red Velvet Cake, Snickerdoodles, and Chocolate Buttercream Frosting. You can even whip up no-bake desserts like Oreo Peanut Butter Pie or No-Churn Blueberry Mascarpone Ice Cream. The stand mixer helps you save time and keeps your hands clean. You get smooth, even mixtures for all your favorite sweets.
- Treats you can make with your stand mixer:
- Marshmallows
- Granola bars
- Cakes and cookies
- Frostings and whipped creams
- No-bake desserts
Your mixer makes it easy to try new recipes and impress your friends with homemade goodies.
Mixers food can change how you cook every day. You save time and get better results. Many people love mixers food because:
- They last for years.
- You can use them for many recipes.
- Cleaning is easy.
- Mixers food gives you steady mixing and quiet power.
Share your best tips below!
FAQ
Can I use a stand mixer for gluten-free baking?
Yes! You can use your stand mixer for gluten-free recipes. It mixes dough and batter evenly, so your gluten-free treats turn out great every time.
How do I clean my mixer attachments?
Remove the attachments and wash them with warm, soapy water. Dry them well before putting them away. Most attachments are dishwasher safe, but always check your manual.
What should I do if my dough climbs up the hook?
Stop the mixer and push the dough back down with a spatula. Start mixing again on a lower speed. This helps keep your dough in the bowl.